")

If you have an artistic mind, or you like dabbling in creative things, then doing up your own DIY wedding invitations and stationery for your big day will be a breeze. But, if you wanted some ideas to jolt your mind, we have a few so you can stand out from the millions of other weddings happening around the year.
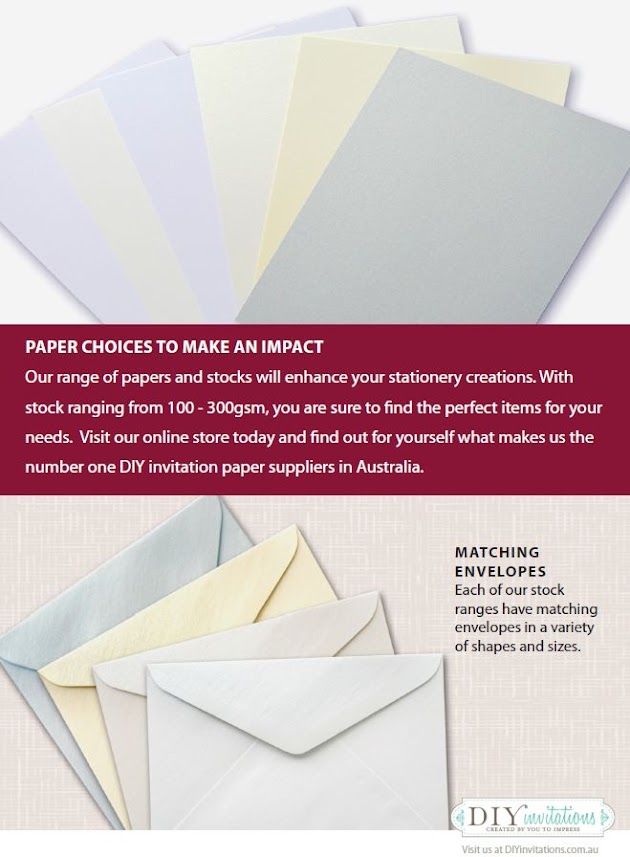
All you need for your DIY wedding stationery is basically a medium to start with and it’s usually with paper or card stock. Now, if you have chosen a paper or card that you like for your DIY cards, whether it’s smooth, textured or has a sheen, you are just about ready for the next stage. Decide whether you want it professionally printed, handwritten (provided you or whoever is going to write it has nice legible handwriting), or you are opting for a calligrapher. If you want it professionally printed, you can select the printable templates and word your own invitations and have the stationery supplies company you are purchasing from do the printing before they deliver the card stock and other items to you.
Now, once you’ve decided on the base of your wedding invitations & stationery, you need to also think about additions to the empty card or even if the template you had printed. You can add ribbon, lace and embellishments. For the envelopes you may have chosen (if you haven’t, make sure your invitations fits into the sizing you choose), you can add an element of surprise with the envelope liners, envelope seals or even a custom stamp.
When it comes to the actual DIY wedding stationery items such as the DIY wedding invitations, the reply cards, wishing well card, gift registry card, accommodations card, order of service, place cards, menu cards, the list goes on; you need something that will pop out and make an impression. Here’s a great idea for you – Watercolour Letter Silhouettes!
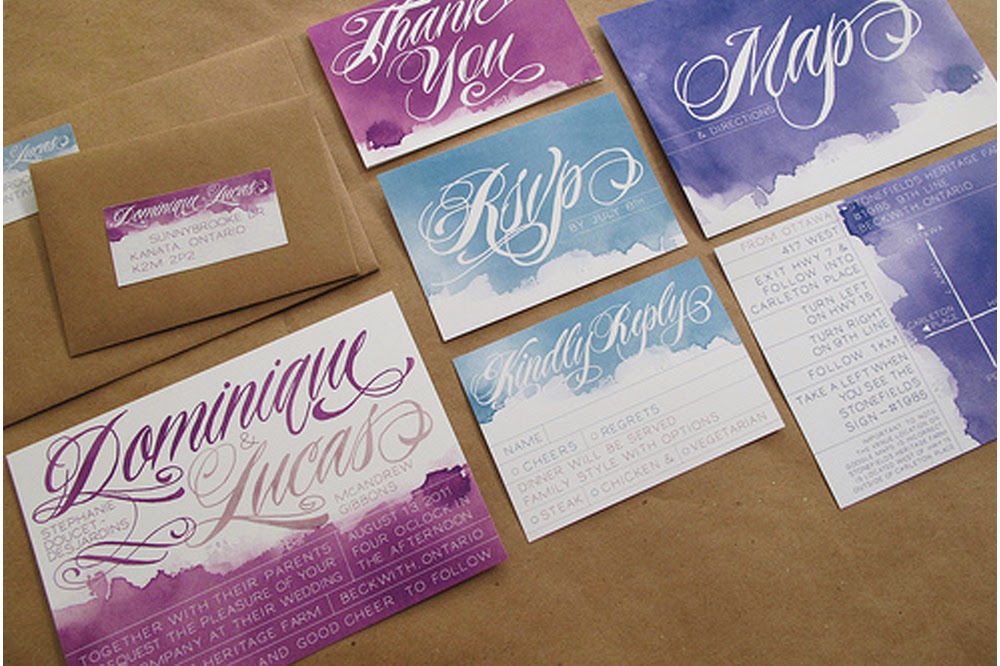
If you want a certain element from your DIY wedding invitations and stationery to pop and be something truly different, try out this watercolour silhouette technique. All you need is card stock, a pencil, some watercolour paints, a little water and of course, a brush to apply the wonderful colours all together.
To get the letter silhouettes, it’s advisable to use card stock or thick paper as the technique will otherwise ruin the paper itself. How you do this is by –
1. First stencilling out the letters on a piece of paper and then using the stencil to get an outline of what you want clear of watercolours.
2. Apply water onto the paper without applying it inside the stencilled area reserved for the letters.
3. Dab paint onto your brush and the dab the brush onto where the water has been applied. The water will help smear the paint onto the card stock. Make sure you do not apply it too close to the outline or it will bleed in. To make sure you get a clean look around the letter, use the brush to push the watercolour to fill in the gaps, creating this beautiful finished look!
Stay tuned in with the DIY Invitations Ideas blog, for more cool ideas for your handmade wedding with great DIY ideas for your stationery.