by | Apr 11, 2014 | DIY Invitations Ideas, DIY Paper & Card Stock, DIY Wedding Invitations, Wedding Speciality Paper
There are so many fun and new ways to do up your DIY wedding invitations, but here’s a really cool way to stand out. Paper-cut DIY wedding invitations! Yep, you read that right; you can get that laser-cut look for yourself. Your wedding guests and invitees will be amazed; they’ll surely think it was done by a professional! Can you imagine their faces when they find out that it was all you? You can even add a little note that says “DIY Bride” and insert your name too!

Here is a list of supplies you will need to make your Paper-Cut DIY Wedding Invitations
- Quality DIY Invitations Card/Paper Stock (make sure this will fit in your printer). You can also opt to get DIY Invitations Printable Templates too, but make sure there is enough room for the paper cutting on the template you choose to fit your design onto. It’s best to do a few samples before you order your paper/card supplies in bulk
- DIY Invitations Envelope. You can also opt to get envelope liners and seals if you wish
- Scissors
- DIY Invitations Specialty Wedding Paper (this will be used if needed as a backdrop for the paper-cut design)
- Glue
- Scalpel
- Cutting Mat
- Printer Access (do a trial run with the printer with inexpensive paper to make sure the printer doesn’t leave any trail marks on the paper)
- Calligraphy Pen (if you need to add hand written notes. This can be used if you are not opting for DIY Invitations Printable Templates)
- Guillotine
Here are the steps to your own paper-cut DIY wedding invitation!
Step 1
Find a template that you like, be it floral, art deco, or any theme for that matter, print it onto your card stock. Make sure to set the dimensions of the paper properly before you print. It’s always best to print on inexpensive paper before you are ready to print on the DIY wedding invitations card stock. Once that is done, prepare your card, by folding it if needed.
Step 2
Cut out the design you have printed. Make sure your hands are clean. Place the cutting mat on a smooth surface, then get to work on using the scalpel to cut out your template, one incision at a time. It helps to turn the paper to make the area you are about to cut perpendicular to your body to help with precision. Make sure to be extra careful with the finer areas, and to brush away cut pieces gently in case of tears.

And that’s it. If you would like to put in a backdrop with coloured or textured paper, go right ahead, or you can leave it as it is. It’s all up to you and your beautiful vision.
by | Apr 2, 2014 | DIY Boxes, DIY Embellishments, DIY Envelopes, DIY Invitations Ideas, DIY Paper & Card Stock, DIY Wedding Invitations, Wedding Speciality Paper
DIY wedding invitations can entirely be classy; it’s all about getting the right materials for it, having a great inspiration and vision, and the ability to execute it to a T. Now what will you need for a classy DIY invitation to your wedding, you might ask? There are two ways to go about it. One would be to start from scratch, make it truly yours from start to finish, and another would be to use templates that are already available and all you have to do is add your personal touches to make it your custom design DIY wedding invite. It’s easy-peasy!
DIY Wedding Invitations from Scratch
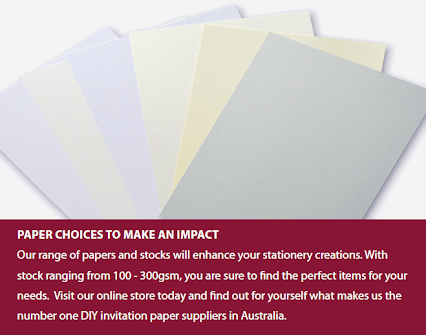
When you are planning on doing up your DIY invites from scratch, your first go to place should be to the stationers, but at DIY Invitations you can get it all at the click of a few buttons. Select from the vast range of options of blank wedding paper to speciality paper with many colours and textures that might be the right accent that your design will need. You can also purchase various other items such as envelopes and embellishments from the DIY Invitations online store too! Be inspired by layered wedding invitations and hard cover sleeved invitations to create a look that is truly unique and wonderful.

DIY Wedding Invitations Using Printable Templates and Sleeves
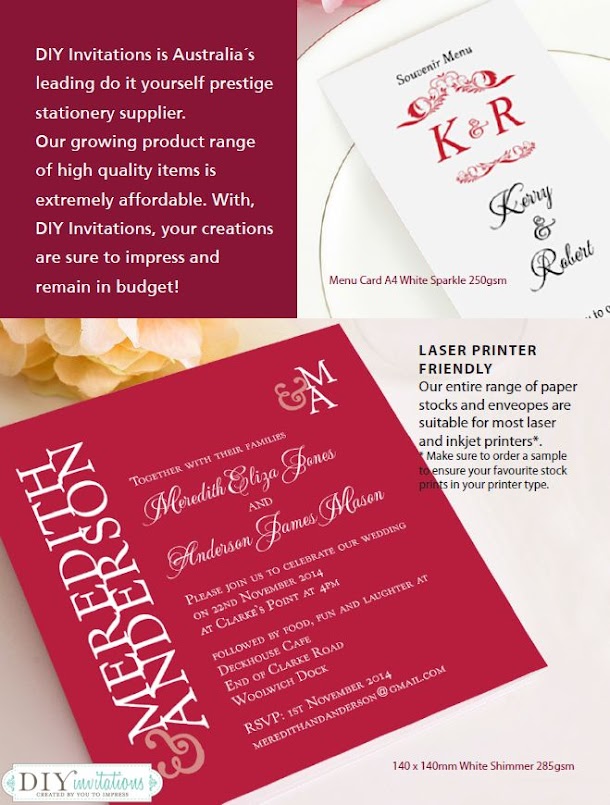
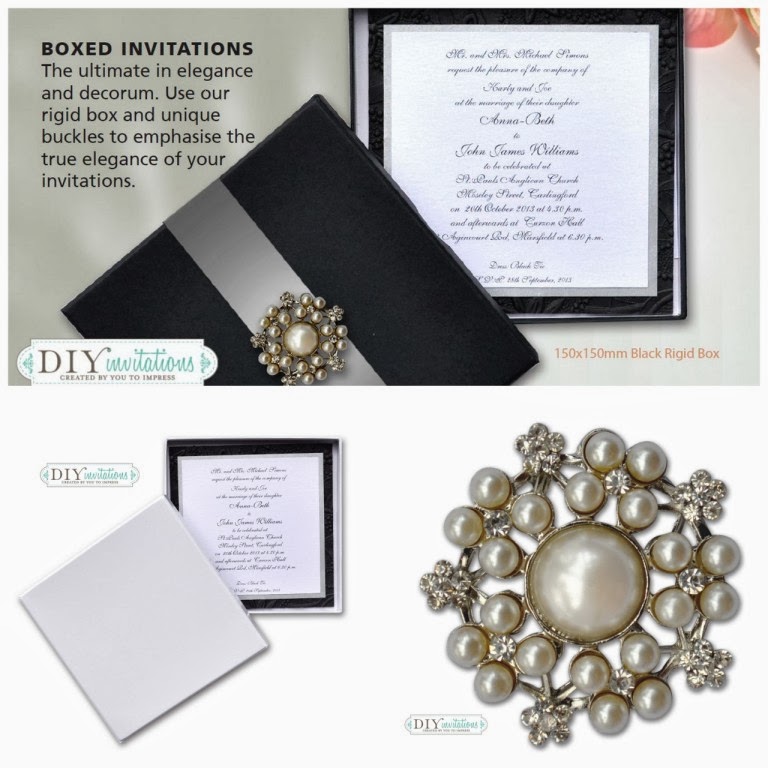
Now, when you opt for printable templates, you are cutting your time in half and you are able to put your focus entirely on the design and personalisation aspects and this would be the easier option if you have many invitees. You can also choose a DIY wedding invitation printable template that offers an invitation wording so all you need to do is customise it, and also opt to have guest names printed so you can skip out on writing it all down or hiring a calligrapher. There are many styles, shapes and sizes to choose from and making elegant wedding invitations that are handmade is all about balance and when to say “enough”. Overdesigning can often push your invite from classy to a blurred area. With hardcover DIY wedding invitations, you get the option of being subtle and elegant, coupled with a satin band and a faux diamante embellishment in the centre; it would truly be a classy wedding invitation.

With either option you choose, the classiness doesn’t stop there. Why not send your handmade beautiful wedding invitation creations in a lovely invitation box. Imagine the statement you are making, all DIY and by you! Go on; make an impression with these great items all available at the DIY Invitations online store.
by | Mar 25, 2014 | DIY Invitations Ideas, DIY Paper & Card Stock, DIY Wedding Invitations, Engagement Invitations, Wedding Invitations Ideas, Wedding Speciality Paper
If your creative mind is on the lookout for some great ideas for your DIY wedding, starting with fabulous DIY wedding invitations, you probably need a blank canvas to work on such as with cards in particular sizes and shapes for you to add your magic onto. Here are cards and shapes available for your weddings and other special events.

DIY Wedding Invitations to DIY Party Invitations
The following choices of invite card sizes and shapes are perfect for your special occasions such as a wedding or a party that you are hosting, be it an engagement party to a birthday party. Creating a custom and handmade look is easy when you have a foundation such as these DIY Invitations cardstocks in several shapes and sizes to pick and choose from.
- Square | Vertical or Horizontal | Size: 134 x 134mm
- Square & Pocket | Size: 138 x 138mm
- Flat 5×7 | Vertical or Horizontal | Size: 127 x 178mm
- Flat Square | Size: 140 x 140mm
- Horizontal Tri-Fold | Size: 134 x 134mm
- Flat Boarding Pass | Size: 195 x 90mm
- Passport Cover | Size: 88 x 125mm
- DL Z-Fold | Size: 99 x 210mm
- DL Tri-Fold | Size: 282 x 180mm (open)
- Square | Horizontal & Pocket | Size: 139x 139mm
- Square Vertical Tri-Fold | Size: 145 x 145mm
- Folded | Horizontal or Vertical | Size: 134 x 90mm
- DL Vertical or Horizontal | Size: 210 x 105mm

DIY Wedding and Party Stationery
Apart from the invitations, be it small or large in size, you also need DIY stationery, when you are looking for a handmade and personalised look. So consider items such as place cards, menus and other items such as accessories to the invitation, and pick and choose which of them your wedding or other special event will need them.
- Folded Place Card | Size: 70 x 95mm
- Menu | Vertical or Horizontal | Size: 260 x 95mm
- Business Card | Size: 55 x 90mm – This size of card would be perfect for a gift registry or wishing well card, with minimal text
- DL Label | Size: 210 x 100mm
- Oval Envelope Label (10up) | Size: 35 x 55mm
- Thank You Tags (20up) |: 22 x 45mm
- Bomboniere Tags (9up) | Size: 35 x 60mm
by | Mar 6, 2014 | DIY Invitations Ideas, DIY Paper & Card Stock, DIY Wedding Invitations, Wedding Speciality Paper
If you are creative, you’ve probably got a lot of great ideas swimming around in your noggin. But, if you are looking for some inspiration on what to do for your DIY invitations for your wedding, we’ve got this great technique for you to try. All you will need is some card or paper stock which you can easily get from our DIY Invitations online store, some white wax (non-water soluble) crayons, watercolour paint, wax (parchment) paper, a pencil something to trace your design with (such as a tracing pen or even a pin) and either a sponge or paintbrush.

Firstly, figure out a look that you want. Do you just want to go ahead with an illustration using this technique? Would you a focal feature in your DIY wedding invitation design? Do you want to pair it up with a pattern, or do you want to include this design as part of a trim (such as a layer for a layered DIY wedding invite). Once you have a general idea on what to do then you are ready for the next step, but in case you don’t, there’s no harm in doing up a few DIY wedding invitation samples for your family and close friends to vote on and decide.
Secondly, if you have decided that you want to do up an illustration, a focal design feature or even a pattern, then that’s great. Here’s what you will need to do before you start working your magic. You need to stencil out your illustration onto the likes of wax paper. This will allow you to easily transfer the illustration onto the required number of DIY wedding invitations covers. You do this by keeping your drafted illustration on the bottom and then tracing over it with a pencil. Then you take one of the invitations, and on the front you start tracing over it with a tracing pen or any other item that serves the purpose such as a pin or even a fountain pen (without the ink). The point is that it needs to leave an indentation on the card stock or paper stock so that the illustration is visible to a certain extent. The very same applies to a focal design. However, if you are opting to play with colour atop a pattern such as leaving certain areas of a pattern white or a coloured in section separated to the rest, then make sure you transfer the pattern in via stamps or print and then set about using the crayon resist technique.
Once this is all ready, what you need to do is trace over the area that you do not want coloured in with watercolour, be it the illustration, design or the pattern. Afterwards you can use either the sponge or a brush, use some watercolour mixed with water and start blotting onto the paper as you see fit. You will notice that whichever area the crayon was applied to, the watercolour will not stick and will stand out. This is how you go about creating a truly unique and sensational DIY wedding invitation with just a few simple materials.

Stay tuned for more unique DIY wedding invitations ideas here on our blog.
by | Feb 12, 2014 | DIY Boxes, DIY Embellishments, DIY Envelopes, DIY Invitations Ideas, DIY Wedding Invitations
Planning a wedding is fun, but when you have complete artistic direction over your wedding, now it’s a whole different ball game. It’s not just going to be fun because when you get your family and friends involved in the process it’s going to be a ball. DIY wedding invitations, wedding stationery, decor, fun wedding activities, there is so much you can do it make a beautiful handmade wedding come alive. Let’s find out some great popular ideas for you to try out for your DIY wedding.
The first place you should start would be to think up a great wedding theme with lots of handmade touches, unique accents and definitely something new for your invitees and guests to appreciate. You can start off with your DIY wedding invitations and the accompanying invitation accessories, use the same colour or style design in the rest of your wedding using exact or similar designs with the stationery, decor and more.

With the wedding invitations, you are offered various types of options across shapes, colours, textures (and speciality paper), envelope styles, hardcover designs, to the way they fold. You are also offered the option of choosing whether to start from the wedding paper itself, to choosing blank folded cards (of different varieties), to ones that are DIY wedding invitation templates (that are delivered to you with the wedding invitations and even guest information printed so that all you need to do is add your unique accents and send them off). One thing you can do to accentuate your DIY wedding invitations package or envelope would be to add a DIY envelope liner for that added pop as your invitees open it up, or even a personalised envelope seal. The rest of your DIY wedding stationery can also take after the same look you have devised for your DIY wedding invitation for your theme to flow.

Other ways you can add to your wedding’s look by opting to DIY would be to work on what will be included on the wedding day itself, such as the wedding stationery we just talked about being a lot like the invitations, to the various decor elements and not to mention the bombonieres. Presentation is important and the same applies here. What about DIY paper wedding bombonieres or even clear wedding bomboniere boxes that can be assembled easily so that your guests can see the wonder within. These are ways you can really add to your wedding theme and make it all stand out.
Stay tuned in to our blog for more insight into how your DIY wedding can be made extra special!
by | Feb 6, 2014 | DIY Boxes, DIY Embellishments, DIY Envelopes, DIY Invitations Ideas, DIY Wedding Invitations
If you are brainstorming on how to make your DIY wedding a hit, we have some ideas and tips for you to add to your DIY wedding invitations and stationery to make it a little bit more fun and unique.
Playing with Shapes
Shapes are such fun, aren’t they? You can easily transform you DIY wedding invitations and other stationery into fun wedding items by using those scissors (or possibly even a cutter). They either can be square, rectangular, round, triangular or even a hexagon. The possibilities are endless. Get yourself some lovely wedding paper, be it the smooth, with a sheen or textured or even speciality paper and make it count by adding them to your look inspired by shape. Geometry and dimensions are a big trend nowadays, so find out if you can play with those as inspiration to make your DIY wedding invitation something truly unique.

Add a Little Flair
There are many ways you can add flair to your DIY wedding invitations and other stationery, whether it’s accompanying the wedding invites or for the day of the wedding. One such way would be to use trims to a) add said flair and/or b) tie it all together. Lace is one such trim that you can use. There are many types of lace out there and various styles to it. It can be used as a border, a belly band or even as the base in a layered handmade wedding invitation. But you could also find lace that is dramatic, such as a considerably big piece of design such as paisley or damask, cut out that specific design and past it onto your DIY wedding invitations and then glue on rhinestones or pearl beads to add a finishing touch.

Put it in a Box
Presentation is important whether it’s your wedding day or any other day in your personal life. The way you present yourself matters, and as your wedding invitation is an extension of the love you have for one another, shouldn’t it be given the respect of having a great means of presentation too? Why not opt for an easy to assemble DIY wedding invitation box to really set the tone of. This will amplify the look and also let your invitees know the thought you put into such a wonderful DIY wedding invite.
It’s these little add-on and accents that are truly the memorable pieces that when coupled with the shape of your DIY wedding invitations and the way you present it (whether it’s within a custom envelope or invitation box), it jumps out at you and surprises you in a fantastic way.

Images include: DIY Wedding Invitations Shapes such a Stylish DIY Boarding Pass Wedding Invitation & DIY Wedding Invitations presented inside a Stylish Hardy Wedding Invitation Box by DIY Invitations, DIY Wedding Invitations with Lace Trims, Rhinestone and Pearl Embellishments. Image by TrendyMods


